October 30, 2015

DIY Floating Ghosts

I like to think I'm crafty, but the truth is, I haven't really crafted all that much in the last several years. But sometimes, the inspiration strikes and even I'm surprised with my results. I'm not quite sure how I stumbled upon the pin to make hanging ghosts, but I guess that is the rabbit hole that is pinterest. Originally, I just planned on making mini hanging ghosts because I thought it was something fun that Sully would get a kick out of, but then this post inspired me to be a bit more creative. Although, I will admit, a few things from that tutorial totally didn't work out for me, but don't worry, I've got easy, fool-proof instructions for you if you want to make your own floating ghost heads! I promise, if I can make these, so can you! No pinterest fails here!

Floating Ghost Heads
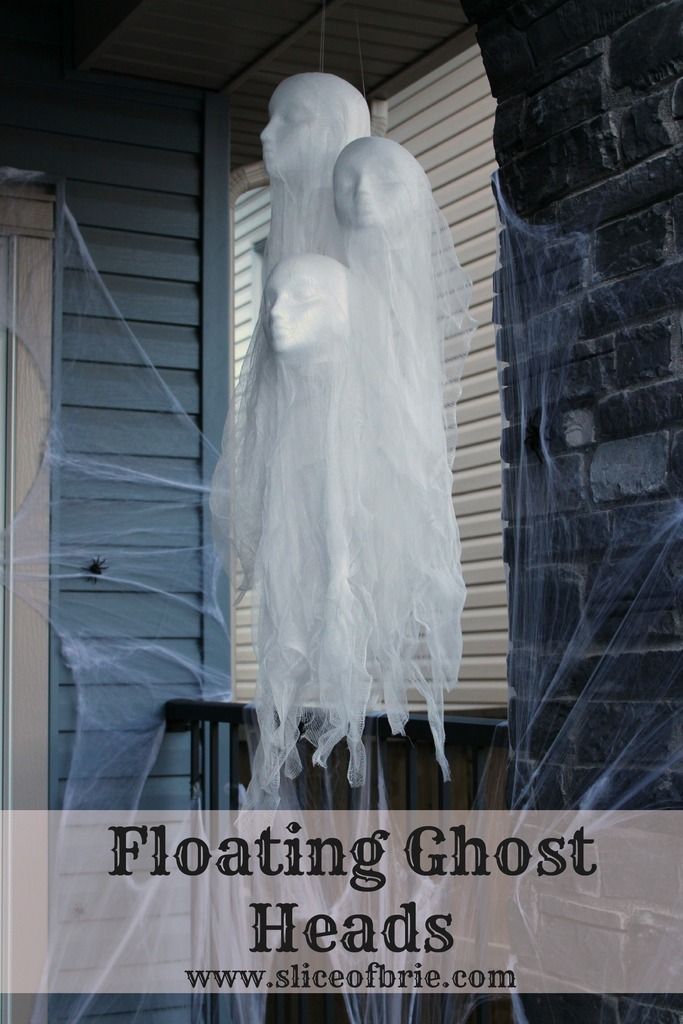
floating ghost heads

All you need:

-Styrofoam mannequin heads
-3 yards of cheesecloth per head
-mod podge
-paint brush
-E-Z Ancors #8
-screwdriver
-monofilament line/fishing line

I bought my Styrofoam heads for four dollars a piece at Value Village. I'm kicking myself because I did see them at the dollar store at the beginning of October, but I didn't have this project in mind then. The cheese cloth I bought at the dollar store, the monofilament line we already had in the garage, along with the E-Z Anchors. Mod podge can be found at Walmart or any craft store. You don't need a fancy paint brush, the one I used was a cheap one from the dollar store. The tutorial I had originally found on this says to use E6000 glue to glue in eyelet screws to the heads, but learn from my mistake here: E6000 glue cannot be used on Styrofoam as it literally eats away at it leaving a big hole. Luckily I had only used this glue on one of the heads before realizing my error.

To make the heads look even creepier, I cut off the necks. A sharp knife (not a serrated edged one) will get the job done in minutes with no mess. You do not need a special tool to do this.

floating ghost heads

Then, take your long piece of cheesecloth (all cheesecloth I've bought comes in a package of 3 yards), and cut it in half. Drape one piece over the Styrofoam head and then apply mod podge to the face area. This will help the facial features pop and the overall effect will be much creepier. It will also keep your cheesecloth in place. I applied the first layer to all three heads and then went back and applied the second layer, adding a bit more mod podge to make sure the second piece was secure. You don't need to let the mod podge dry in-between layers. The mod podge will dry clear.

floating ghost heads

Afterwards, take a long piece of monofilament line and knot it around the E-Z Ancor (make sure you use a good knot, one that won't accidentally unravel as you don't want your line to slip out - I used a bowline knot). I used anchor size #8 because that is what we had in the garage, but also because it had a large enough thread. Then take your screwdriver and screw the anchor into the middle of the top of the head. It will go in easy (make sure you screw it in and not push it in). The threading on the anchor will ensure it stays in place. So much easier than trying to glue an eyelet screw into the Styrofoam! This way you won't have to worry that your glue won't hold, and I really liked that it makes the anchor part invisible.
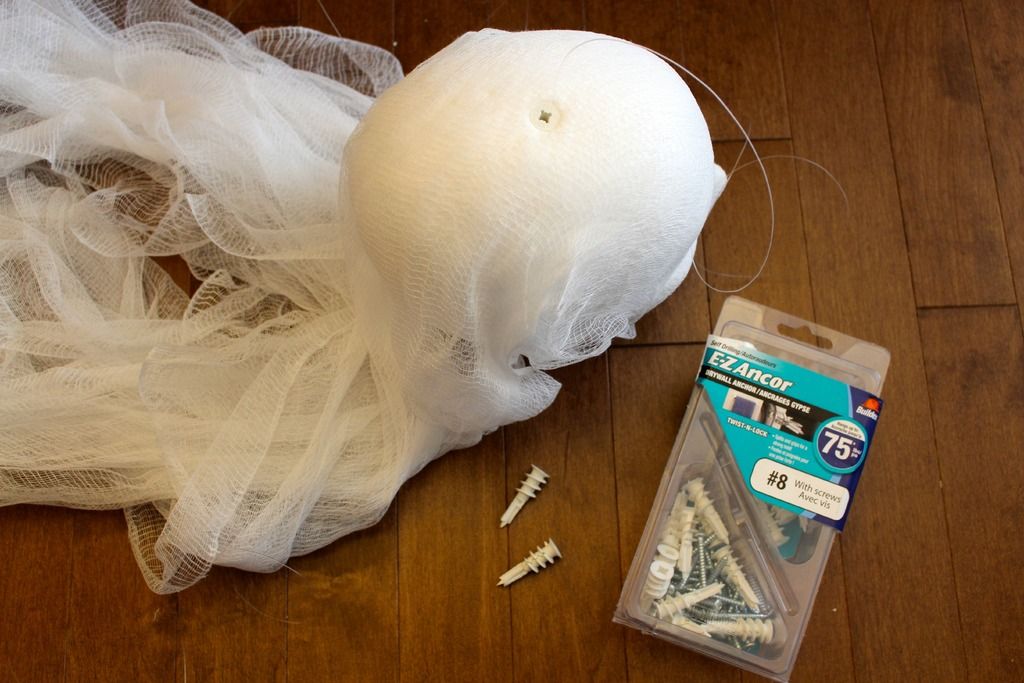
floating ghost heads

All that's left is to hang your ghosts wherever you wish! Super easy and I'm positive I will be making more next Halloween!

floating ghost heads


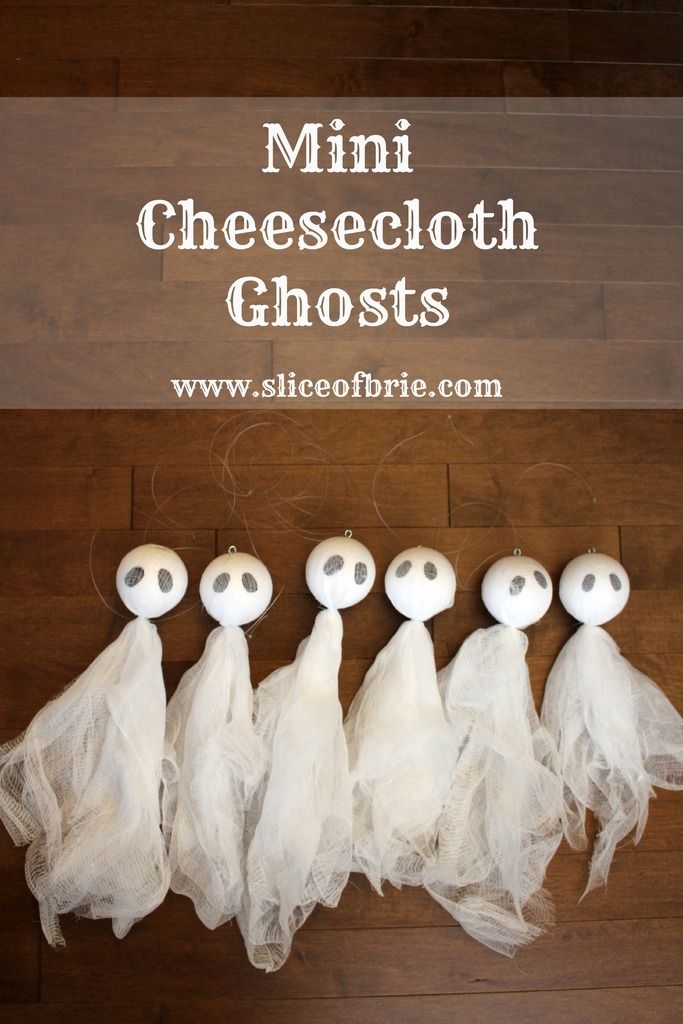
Mini Cheesecloth Ghosts


mini cheesecloth ghosts


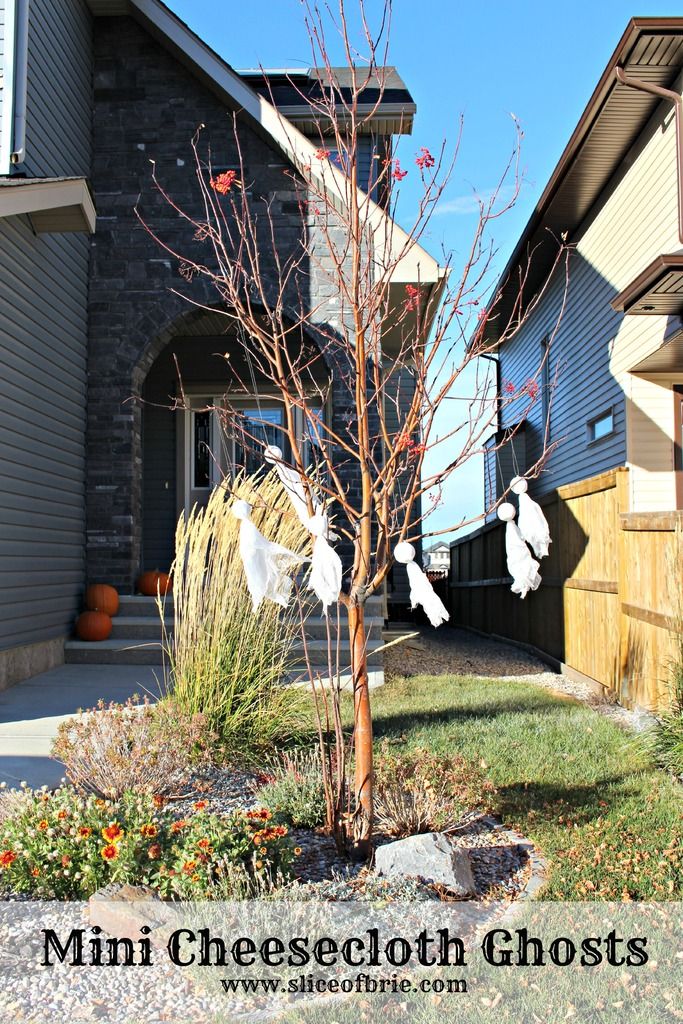
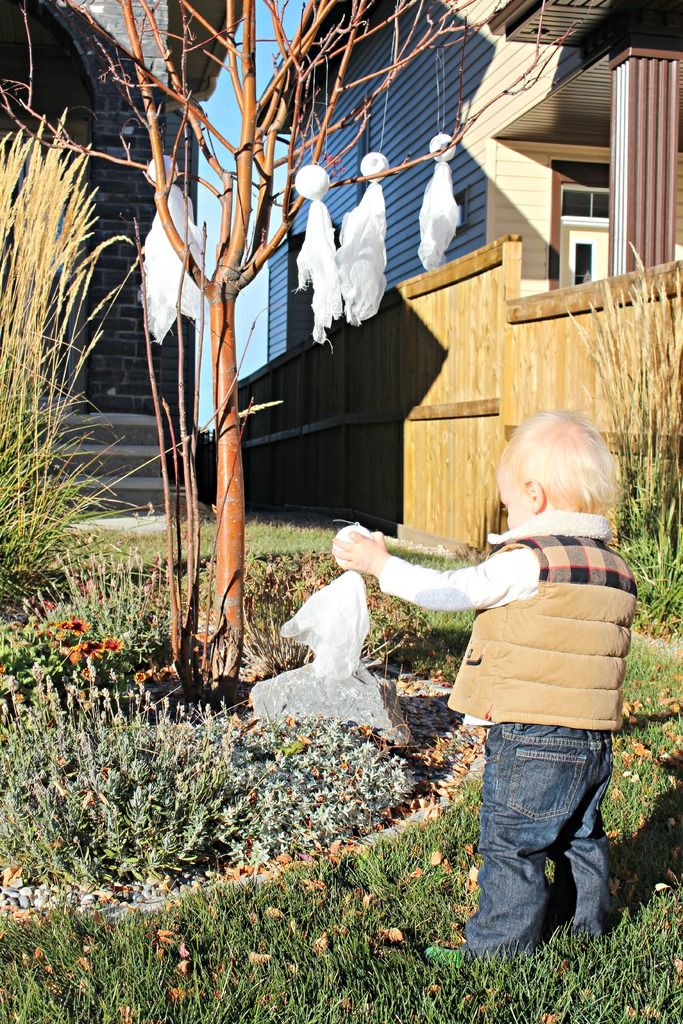
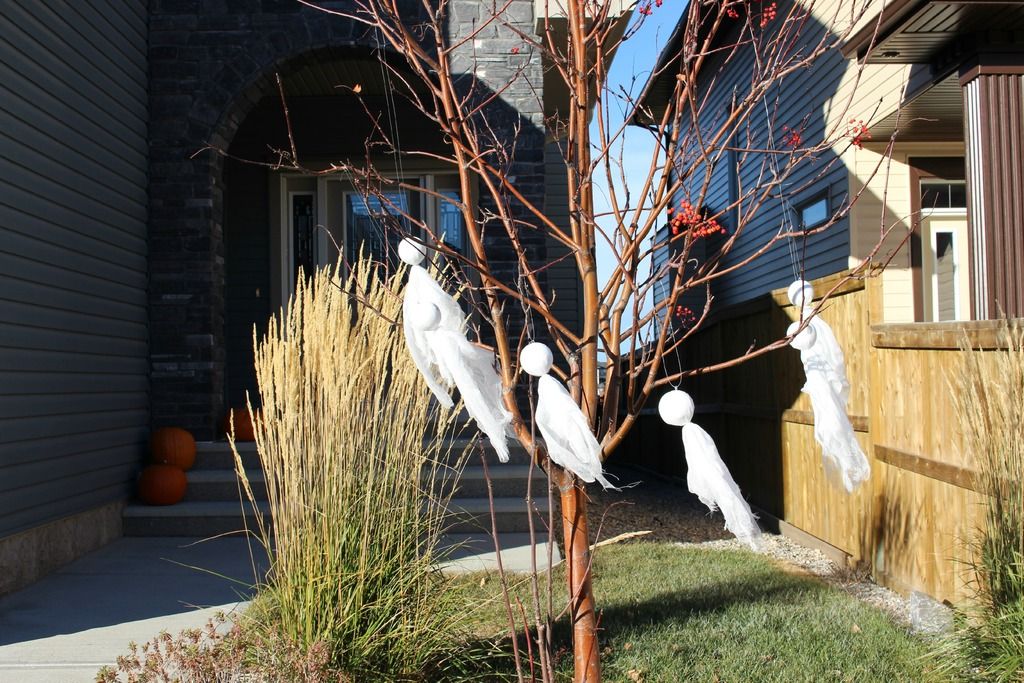
Along with my floating ghosts, I also wanted to make smaller ghosts for our tree in the front yard. These little guys were even easier to make and I think they are pretty darn cute.

All you need:

-Small Styrofoam balls
-cheesecloth
-white thread
-sharpie
-eyelet hooks
-monofilament line/fishing line

For these ghosts, I decided to draw eyes on them just using a black sharpie. Then I cut a big piece of cheesecloth into smaller squares. I didn't measure, you can easily eyeball it, but I did choose to double up the layers. I used white thread to secure the cloth underneath the Styrofoam ball. I attached the eyelet screws into the tops of the ghost heads with mod podge which actually holds well. You could also use the E-Z anchors as I did above, but they are a bit pricey so I only did one mini ghost with an anchor. Either seem to hold up well as the mini ghosts are super light. Attach some fishing line and hang your ghosts where you like! Incredibly easy, and I really like the way the cheesecloth blows in the wind. Sully got a big kick out of helping me hang these "ghoosts" on the tree!
mini cheesecloth ghosts mini cheesecloth ghosts mini cheesecloth ghosts


Happy Halloween! 


October 29, 2015

Thinking Out Loud {#4}: Crafting Fails & Smart Husbands

This week has not been going according to plan. Monday evening, after having quite the productive day, I could just sense that I was going to wake up the next morning not feeling well. And I was right. I was hit with a bad head cold and all I wanted to do was sleep. Not so easy to do when you have a toddler to take care of.

When I'm not feeling 100% all my motivation goes out the window. Write a blog post? No thanks. Make dinner? Hell no. Shower? No. Tidy the house? Haha!! So needless to say, my house is in shambles, I haven't showered and we've been eating snack plates, cereal, and leftovers for the past two days.

Sick, Tired & Awesome meme
{source}
Wednesday was a bit of a better day. I had more energy, but, if given the choice, probably would have happily spent the day in bed. I did manage to work on my Halloween crafts though, a project and blog post I had originally planned to have done and posted yesterday. Whomp, whomp. Of course, no project ever goes as planned either, does it? The tutorial I found on pinterest that gave me the idea for one of the projects totally failed me. In it, it says to use E6000 glue to glue the hooks to the styrofoam heads. Well, I found out that you cannot, in fact, use this glue on styrofoam as it eats away at it and leaves a big hole where you put the glue. Google of course, confirmed this for me after the fact. Now my question is, how did this work for this person then?! Luckily, we already happened to have E6000 glue and I didn't waste money on buying it. At a loss for what to do, I waited until Jim got home and he was actually able to come up with a much better solution than the original instructions, so yay for smart husbands!

Crafting Meme
{source}
Speaking of smart husbands…on Tuesday, the worst day of my cold, I went to make my favourite flu-busting smoothie from the Oh She Glows cookbook. It's essentially oranges, lemon juice, and ginger all blended up. It's delicious! Well, I already had my oranges and lemon in the vitamix, but then I couldn't find my frozen piece of ginger I keep in the fridge for smoothies. Lightbulb moment! You see, on the weekend, Jim made a peanut butter smoothie and it came out tasting like one big ginger peanut drink which was seriously gross. He blamed me for not cleaning the vitamix well enough. I felt pretty bad and thought there must have been some ginger stuck under the blade that I didn't clean out. I apologized profusely! When I couldn't find my ginger in the freezer, that's when it dawned on me: Jim blended my entire chunk of ginger, mistaking it for a frozen banana!! I mean, it kind of looks like a banana when it's frozen, and in his defence, the container wasn't labelled, but come on! Men!

I feel like the worst of my cold is behind me though and I'm positive I will wake up tomorrow (Thursday), feeling almost back to my normal self. I've been drinking lots of smoothies, lots of tea, and upping my vitamin D intake. I'm trying to get to bed at a earlier time, which, even when sick, is hard for this night owl. I'm just grateful I don't have the flu!


As always, I'm linking up with Amanda this week for Thinking Out Loud.


Do your crafts always go according to plan? 

What are your go-to cold remedies?


October 26, 2015

My Weekend in Snapshots

Six snapshots that captured how we spent our weekend:

1. Saturday I got to spend a lovely few hours chatting with my good blogging friend, turned friend, turned hairstylist, Ashley, while she worked her hair wizard magic on me. We decided to stop fighting my natural hair colour and just work with it instead. To say I'm in love with my own hair would be an understatement.

{photo credit: Ashley}

2. I actually cooked a nice dinner on Saturday night. I usually save these kind of miracles for the weekdays, but I guess I was feeling particularly inspired that night. Chicken, tomato and white bean linguine was whipped up, hit the spot and has left us with leftovers for days. Recipe coming at you shortly.


3. Jim worked on touching up the walls in our house, which were pretty banged up when we moved in. No home project would be complete without this little foreman.


4. While the boys taped in preparation for painting, I took on the daunting task of organizing and decluttering this drop zone area. What a disaster. I didn't get very far, but it's my project for the week. Just keepin' it real over here.


5. I'm feeling unusually inspired this Halloween season and bought some craft supplies for some decorations I plan to whip up. Stay tuned!


6. We went to Costco today and these guys snuck their way into the cart. I'm one step closer to embracing cold weather running.


What was one highlight from your weekend?